Installing the Swim Tether Base on a Concrete Pool Deck
Table of Contents
Swim Tether Base Installation Guide
📄 Download PDF Installation Guide
Estimated Time: Less than 30 minutes
Installing your Swim Tether Base Plate into an existing concrete pool deck is a simple process that can typically be completed in under 30 minutes. Follow these steps to ensure a secure and effective installation.
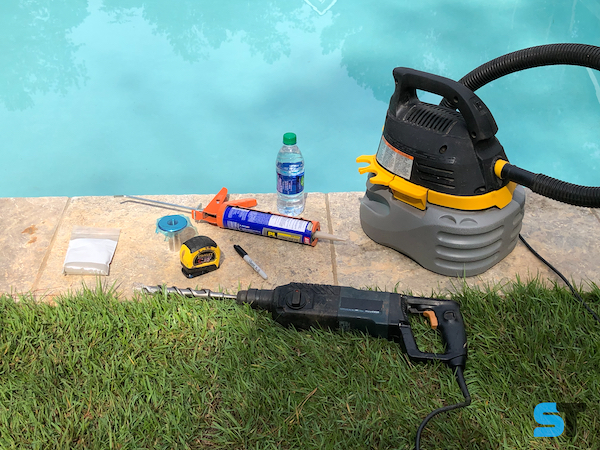
STEP 1: Gather Your Tools
- Swim Tether Base Plate
- Hammer drill (Corded recommended for best performance)
- 1-1/8” masonry drill bit (A 1” bit can work if you slightly widen the hole)
- Hydraulic cement or quality construction adhesive
- Tape measure
- Pencil/marker
- Marking tape
STEP 2: Measure & Mark
Determine the best location for installation.
Optimal placement: 6-8” from the pool’s edge. However, any distance is acceptable as long as it’s compensated with a longer stretch cord.
Recommended: Install in the shallow end for best usability.

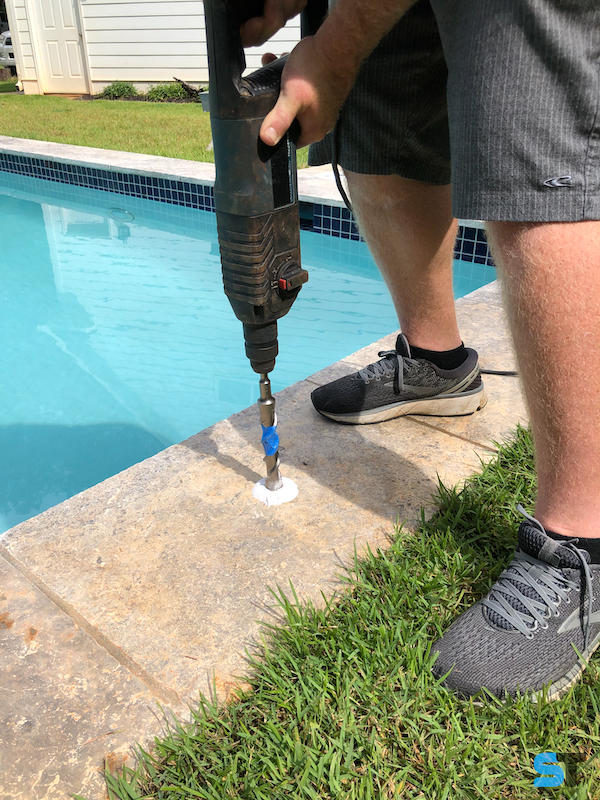
STEP 3: Drill & Clean
Mark your drill bit with tape at 3” depth for accurate drilling.
Keep the drill perpendicular to the surface and drill slowly until reaching the 3” depth mark.
Ensure the hole is clean and free of dust or debris before proceeding.
STEP 4: Check the Fit
Insert the Swim Tether Base Plate into the hole to ensure a proper fit.
If the hole is too tight, widen it slightly to allow room for adhesive.
The base plate should sit flush with the concrete surface.
STEP 5: Secure the Base Plate
Apply hydraulic cement or construction adhesive inside the hole and around the base plate stem.
Press the Swim Tether Base Plate firmly into the hole.
Wipe away any excess adhesive and ensure the Swim Tether logo is aligned properly.
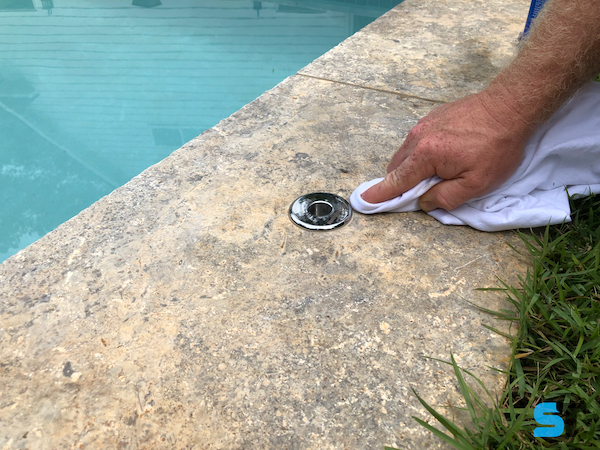
LET CURE FOR 24 HOURS BEFORE USE
For additional assistance, contact us through our website.